Exhibit F was on CBC Ottawa Morning Radio at 8:15am on Monday, May 11th 2009. You can listen to some of the interview here:
CBC Ottawa Morning
Thanks for all the support and interest in our work.
The Exhibit Team:
Grant Vogl & Eric Espig
10.5.09
Exhibit F on CBC Radio
Posted by Grant Vogl at 16:59 0 comments
8.5.09
Exhibit F Hits the News!
Exhibit F hit the newspaper today with a little positive exposure. Erin Fitzgerald from the West Carleton Review interviewed the team a few weeks ago and the article was published in this week's issue of the local paper. Great to get some press! Thanks Erin!
it was also picked up by the Perth Courier
Posted by Grant Vogl at 19:17 0 comments
6.5.09
Video Interactives III
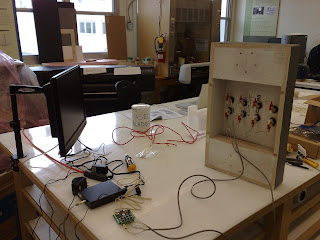 First mock-up with scavenged wires, keypad and DV-66. While Eric worked on formatting the videos, I began learning how to wire LEDs to a power source, connecting TVs with periphery and other electronic experiments. Having never done anything like this, I welcomed the chance to try new things and work my way through a problem until it was solved.
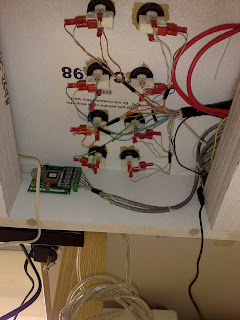 Custom wiring job...Using scavenged wire, a few connectors, and some trial and error I wired up a power source for the LEDs using a variable voltage AC/DC Adapter at 1.5V. It resembles a bird's nest, but I made sure to colour code each switch with all of its 4 connectors. I also tried to tidy things up with some zip ties and electrical tape.
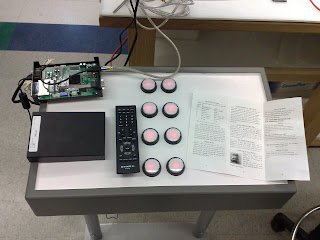 Once the LEDs, switches and video were all working, I began switching a few settings on the player to achieve the best result for the viewer.
Posted by Grant Vogl at 20:34 0 comments
18.4.09
Video Interactives - II
Construction of the first video interactive was started today. An existing pedestal was first lightly sanded, then, using a printed mock-up, the hole position was determined for button/switch placement.
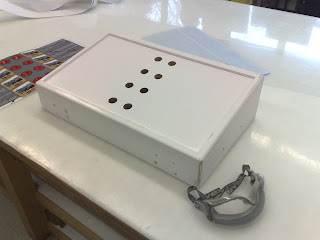 Pedestal with post holes. The box is hollow underneath the button holes and will house the DV-66, controllers and wiring.
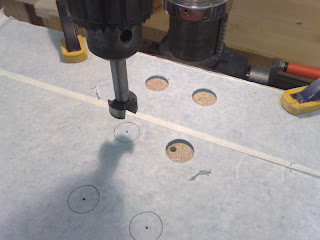 Using a Forstner bit, I cut matching holes into a piece of 1/8" acrylic to cover the final printed text/grapic panel.
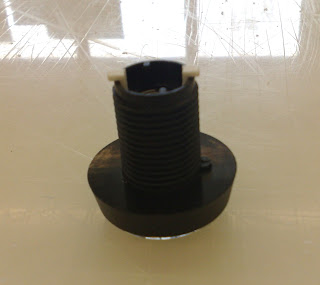 Each switch came equipped with a locking notch, so each corresponding hole was also given a notch using a 1/4" drill bit, thus locking the buttons from turning and twisting the wires.
Posted by Grant Vogl at 17:08 0 comments
Labels: cases, digital, display, interactive, video
14.4.09
Lighting Installation - I
 Lighting installation began today. We are using "fake" track lighting with 4 halogen bulbs. The lights came stock with 50W bulbs, but we will most likely be installing dimmers and new bulbs.
 Once placement was determined, holes were sawed into the ceiling tile to fit the lighting boxes. After the lights were set up, it was much quicker & easy for the Electrician to wire them up.
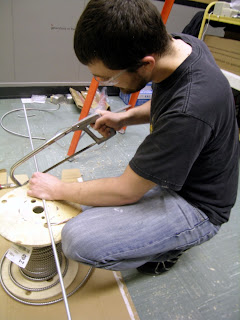 Light boxes were installed using existing ceiling channels (a Diefenbunker speciality), welded bolts and collars and threaded rod cut to length.
 View of threaded rod and lighting box from above the ceiling tiles.


Lights up! Currently, the installation is complete but the lights are not aimed or balanced.
Posted by Grant Vogl at 21:20 0 comments
Labels: asbestos, ceiling channels, halogen, installation, lighting, track lighting
Mount Construction - I
Each and every one of our exhibition artifacts requires a custom mount, both to provide proper support and protection, and to work with our existing cases in a functional and aesthetic way.
We chose to work in acrylic and keep the mounts simple. Acrylic sheet was cut to size based on individual artifact needs, and bends were created using a heating element and wooden jig cut to 45 degrees. Additional supports are provided by mylar banding, the addition of support posts and shelves, and padded, and carved extruded polystyrene and muslin mounts.
 Simple supports and common bends allowed for ease of production as all artifacts require a custom mount for display.
16.3.09
Cases IV- Pedestal Construction
 After all the pieces were cut, I decided to use a locking mitre bit on the router table to give a better bond and more surface area for the glue to stick to.
17.2.09
Panels V- Pressure Mounting to Substrate
 We began mounting our printed/laminated panels to their gatorfoam substrates this afternoon. The first step was trimming the prints right to the edge. Take your time, straight cuts really count.
 The backing was then peeled off of the top 1" or so, aligned and stuck onto the substrates with care. Our prints were made approx. 1/8" larger than the substrates, so we had a small amount of play on all sides.
 Keep everything clean! Little bits can get embedded and leave bumps. The same machine laminates and mounts. Pressure mounting required no webbing, just an adjustment of the nip height for 1/2" gatorfoam (see previous diagrams for laminator anatomy).
 In this photo the Gatorfoam with red painted edges is coming out of the rollers with the print adhered to the surface. I am holding the backing in my hands as the rollers pull the substrate through the machine and the backing is slowly left behind
~Eric.
Posted by Grant Vogl at 19:43 0 comments
Labels: gatorfoam, laminate, Pressure mounting, self adhesive backing, substrate
11.2.09
Panels III- Lamination and Substrate Prep


Posted by Grant Vogl at 22:04 2 comments
Labels: gatorfoam, lamination, materials, panels, substrate
31.1.09
Panels II- Printing
 Printing began this week. We don't want to give too much away just yet, but so far progress is good. Panels are being printed using Adobe Illustrator and the HP DesignJet 800PS. At approximately 1 minute per megabite (Post Script processing speed), we estimate a total printing time of around 33 hours. Luckily, most jobs can be set to run over night and on weekends. Keep checking back for more updates.
Posted by Grant Vogl at 11:20 2 comments
Labels: illustrator, panels, Printing
28.1.09
Panels I - Construction
Before moving your materials into your printing and laminating space, make sure to clean dust and particles off with a brush and/or vaccum. These these little specks can contaminate other "clean" machinery (computers, printers etc.) or get laminated over top of, leaving small bumps on your finished product.
To ensure straight clean cuts, concentrate on the fence, not the blade. Pressure should be exerted on the diagonal towards the fence to the right of the blade. Feeding from the opposite side can cause binding, over-reaching and wobble.
Make sure that your measurements are accurate, and use a rip fence and the factory edge to produce square corners and straight sides. Feed all materials through the blade to the other side.
It also helps to have a pair of extra hands when cutting large materials. Set your blade so that the gullets between the teeth are at the same height as the top of the material.
With large pieces of material, it is very helpful to have something to act as side and through supports. Here we improvised with overturned material carts, boosted to height with scrap wood and held in place with cinder blocks. Please plan your cuts well, keep your space clean, check your access and movement and review safety guidelines.
22.1.09
Sign Vinyl & Stencils III

To add more detail and atmosphere to the rooms, several more memorable and/or common border area signs were reproduced using sign vinyl. Where applicable, fonts were matched or photos were modified using "Live Trace" in AI to produce a workable stencil file. The lines have been thickened for easier viewing. Files must be "clean" (i.e. solid workable lines, without ghosting etc.) to be properly cut with the CAMM-1.
Below are several of the finished stencils which will be place above doorways throughout the exhibit. The effect is quite good.


 My personal favourite...
The "Cold War Berlin" logo was also reproduced in this fashion using AI and the Roland CAMM-1. Overall, these pieces will build on the atmosphere of divided Berlin and help to transport visitors to that time and place. I was very pleased with the look of this piece, and after a number of modifications in AI, it was cut out without incident.
Colours must be printed separately and assembled later when using a sign vinyl cutter. More to follow...
Posted by Grant Vogl at 14:15 2 comments
Labels: design, graphics, illustrator, sign vinyl, stencils


